













.png)
Step 1
Open your detector
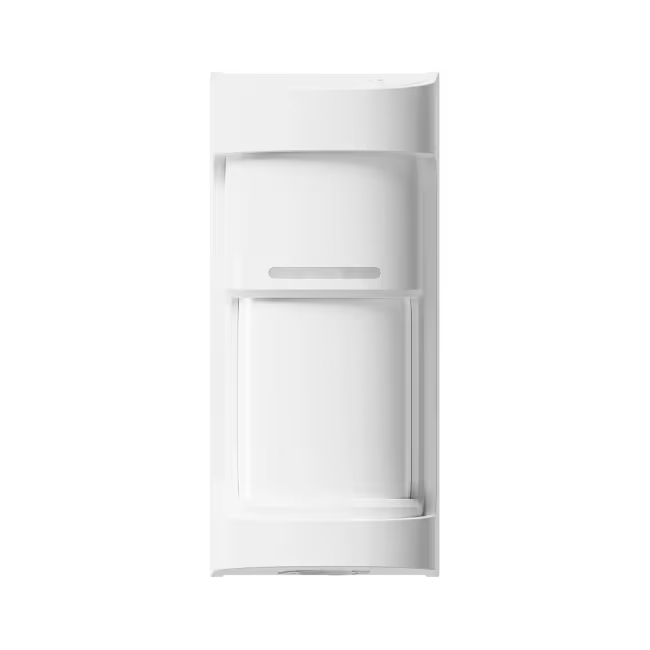
Open your detector to locate the serial port to install the Olarm CONNECT.

Step 2
Locate the detector's serial port
Each detector's serial port location is different. The serial port is a 4 pin connector behind the detector's front cover.

Step 3
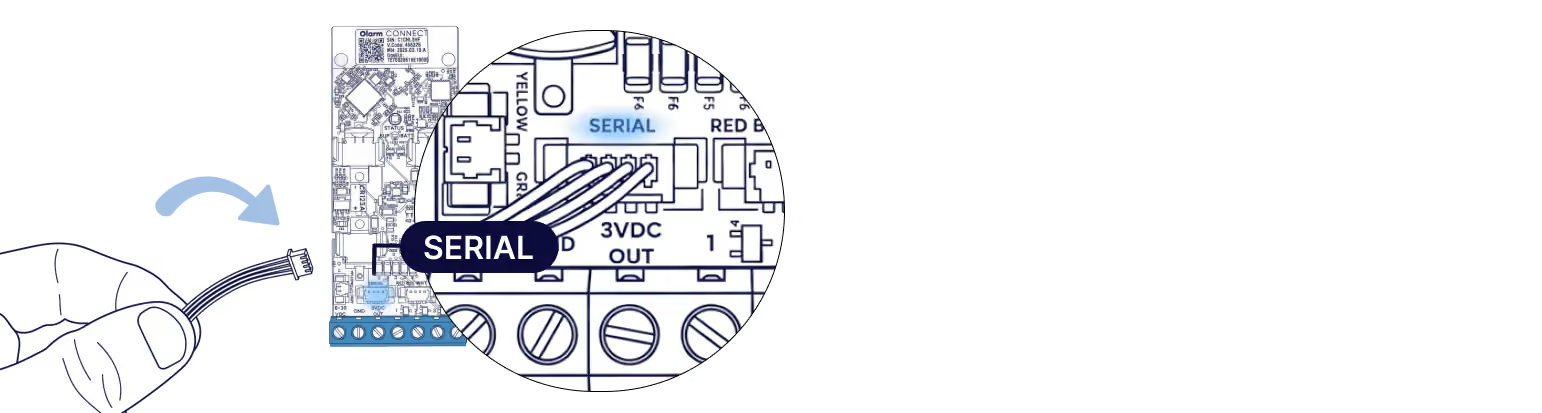
Connect the detector & Olarm CONNECT
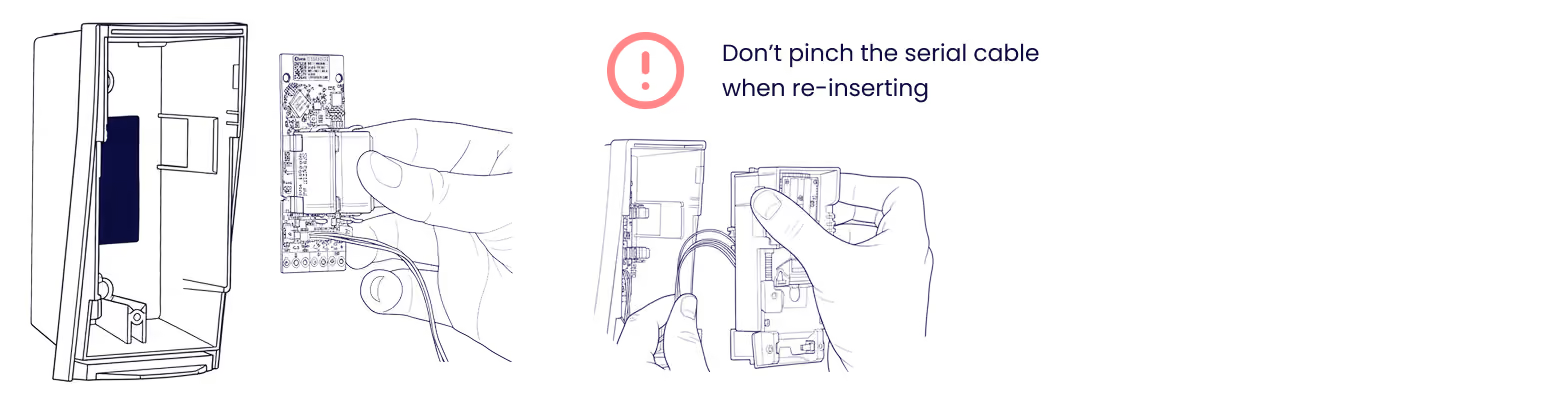
Plug the provided cable into the serial port on the Olarm CONNECT transmitter & plug the other end of the cable into the detector's serial port
Step 4
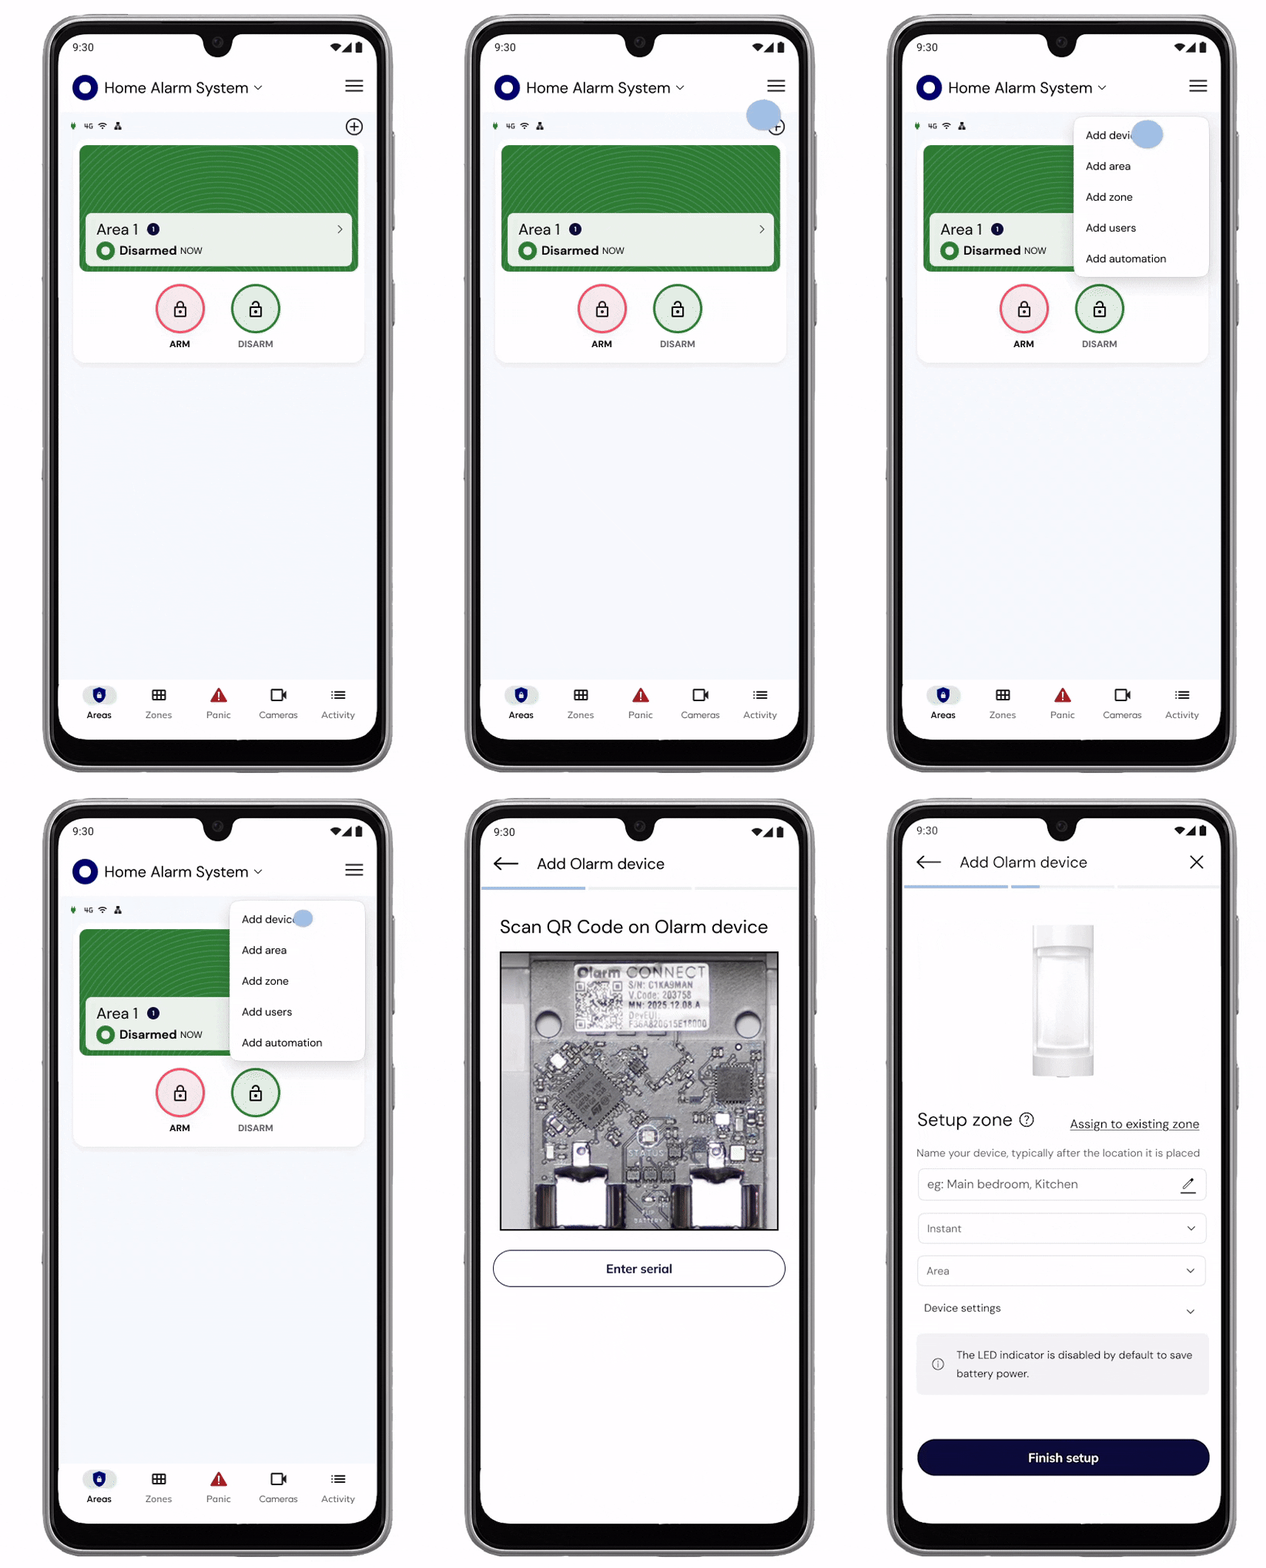
Add your device & configure zone
Scan the QR code on the Olarm CONNECT to add the device, then configure your zone and detector settings.
Step 5
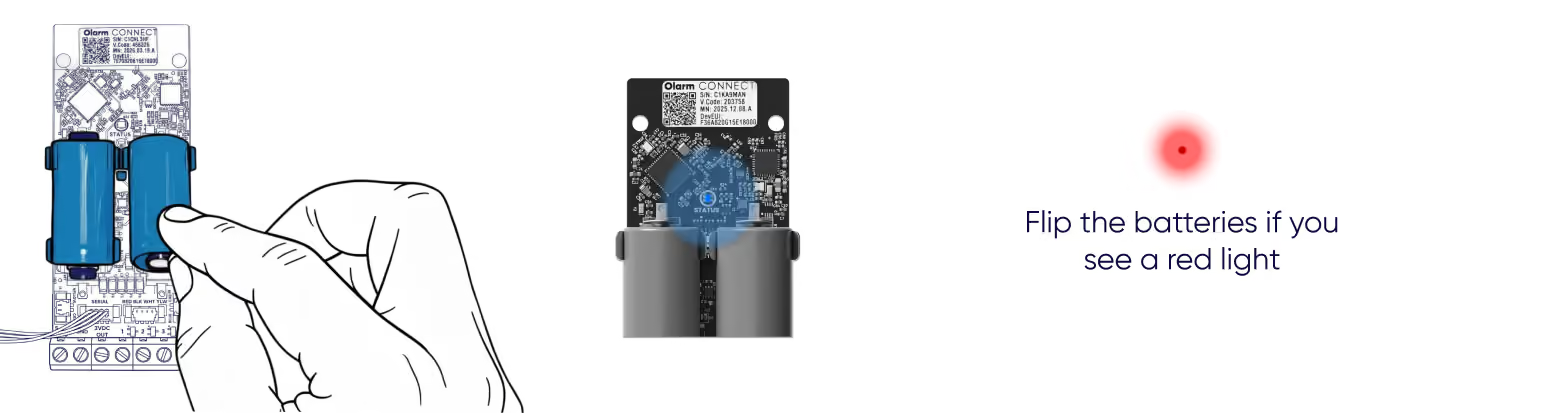
Insert the batteries
Insert the provided CR123A batteries to power up the Olarm CONNECT & detector. The Olarm CONNECT & detector will begin flashing blue.
Step 6
Secure the Olarm CONNECT
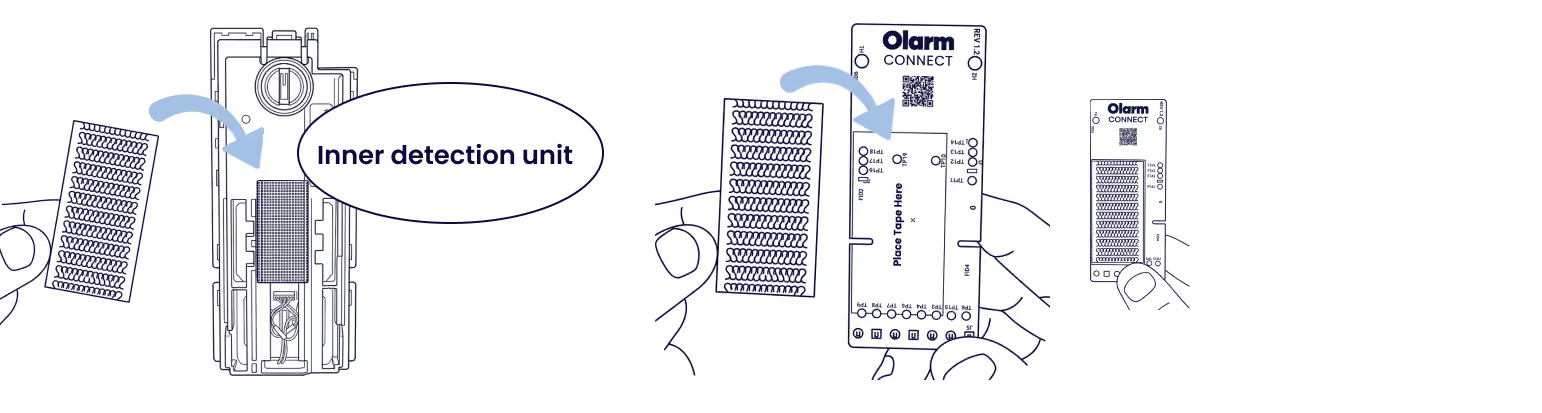
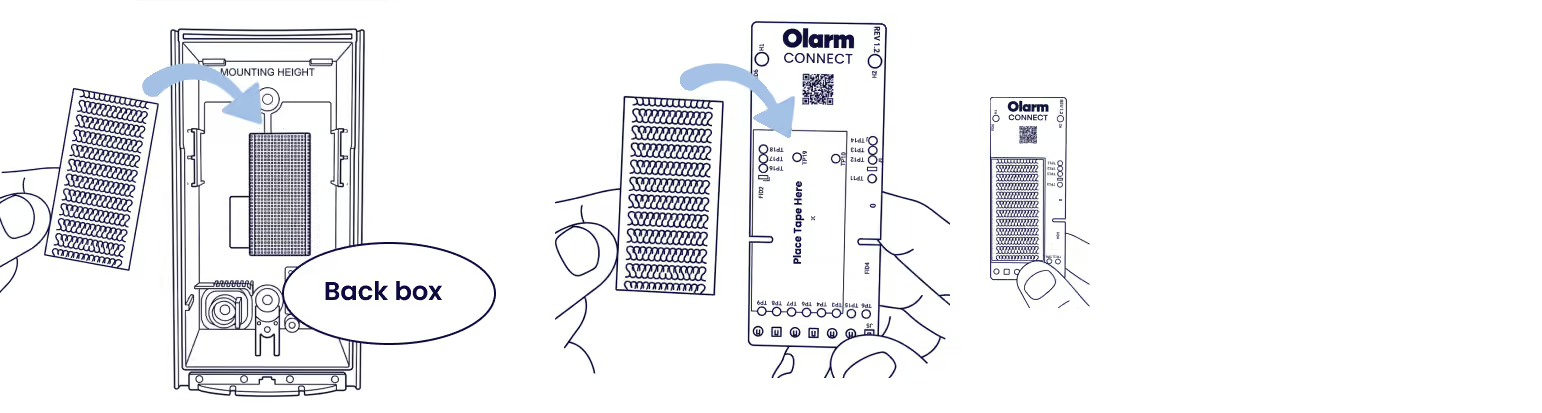
Mount the Olarm CONNECT in the detector's back box using the provided hook & loop tape
Option A
To the back of the detector
Place one side of the hook & loop strip on the back of the inner detector unit & the other on the back of the Olarm CONNECT. Then secure the transmitter.
Option B
Inside the detector back box
Place one side of the hook & loop strip into the back box of the wireless detector & the other on the back of the Olarm CONNECT. Then secure the transmitter.
Step 7
Complete the installation as per relevant detector
Follow your relevant detector's installation guide.
See all guides here to complete your installation.

Tips
Common installation errors
Avoid these common mistakes when installing the Olarm CONNECT on an Optex Wireless Detector:
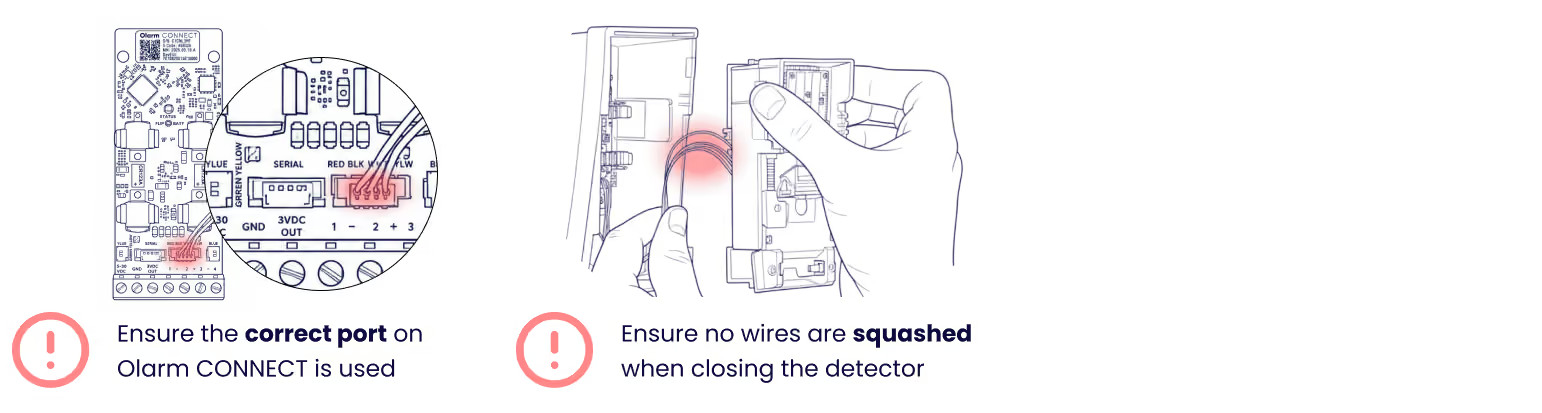
- Ensure no wires are squashed when closing the detector
- Ensure the connector in plugged into the serial port on the Olarm CONNECT
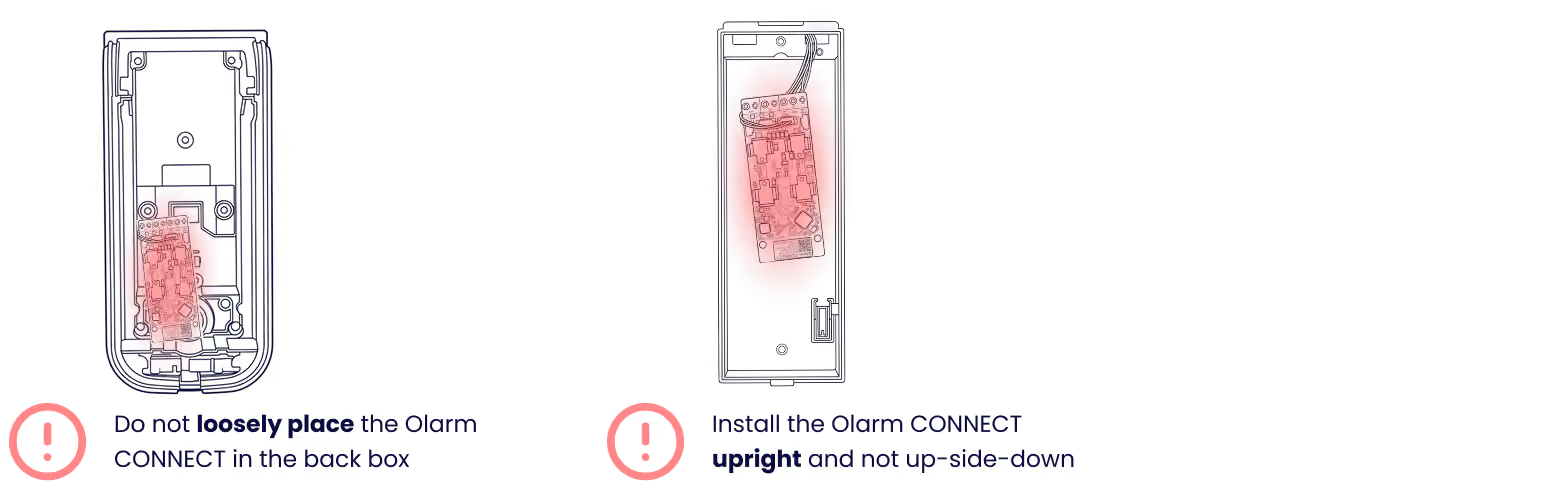
- Secure the Olarm CONNECT with the hook & loop provided
- Install the Olarm CONNECT upright
Troubleshooting
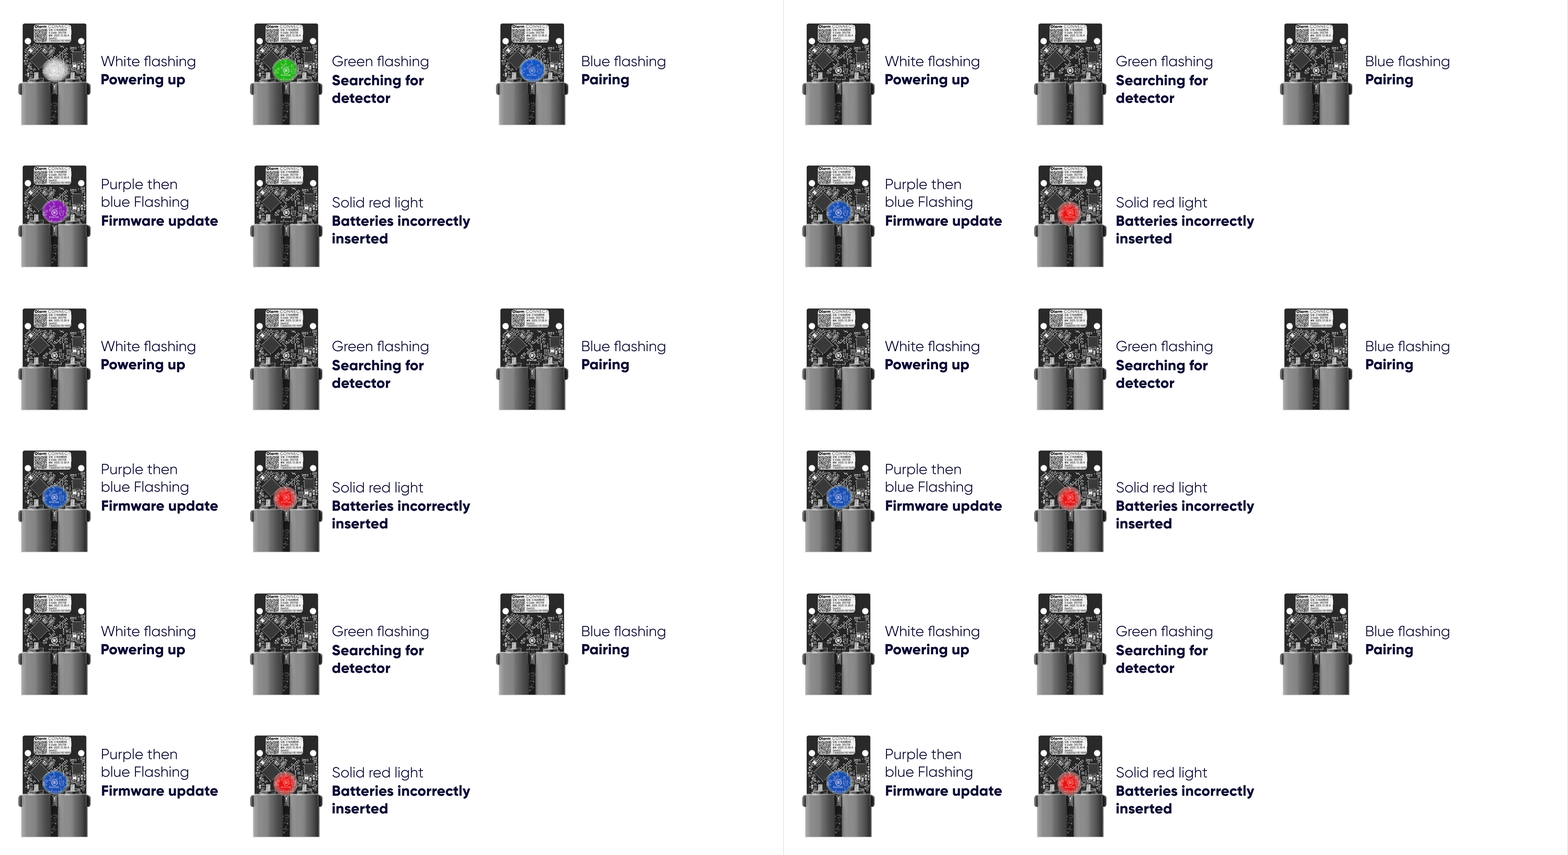
LED states
Understand what each LED pattern means on your Olarm CONNECT.