


.png)
Step 1
Remove the front lid
Use a flathead screwdriver to lift, leverage upwards & release the lid.
.png)
Step 2
Remove the detection unit
Gently pull out the detection unit to access the Olarm CONNECT inside. Carefully place the detection unit aside.
.png)
Step 3
Scan and configure
Scan the QR code on the Olarm CONNECT to add the device, then configure your zone and detector settings.

Step 4
Insert the batteries
Place the batteries into the Olarm CONNECT. The LED will flash blue when powered on correctly to indicate the device is waiting to be added to an Olarm HUB.
.png)
Step 5
Remove the Olarm CONNECT
Detach the Olarm CONNECT from the adhesive on the backbox. Handle with care.
.png)
Step 6 (Option A)
Mount the Olarm SnapX directly to the wall
Use this option when mounting directly to a flat surface.
Step 6.1a
Secure the backbox
Fasten the backbox and tamper breakout to the surface with suitable screws.
.png)
Step 6 (Option B)
Mount the Olarm SnapX using a swivel bracket
Use this option when you need adjustable angling. *Brackets sold separately.
Step 6.1b
Adjust the bracket angle
Loosen the screw in the bracket, set your desired angle, then tighten to secure.
.png)
Step 6.2b
Secure the bracket to the surface
Fasten your chosen wall or ceiling bracket using suitable screws.
.png)
Step 6.3b
Attach the backbox to the bracket
Secure the backbox to the bracket using the provided screws.

Step 6.4b
Re-insert the detection unit
Attach Olarm CONNECT to the adhesive and place the detection unit back into the backbox, ensure it clips in. Avoid pinching the serial cable.
.png)
Step 7 (Option A)
Installing the Olarm SnapX as a High Mount
Mount between 0.8m–1.2m with a 120° field of view up to 12m facing toward the detection area from a high point.

.png)
Step 7.1a
Snap the detector and drop the mirror
Slide the detector upward until it snaps in place, then lower the mirror. Avoid touching the mirror surface. These adjustments are for high mount detection.
.png)
Step 7 (Option B)
Installing as a Low Mount (Pet Alley Mode)
Mount between 0.8m–1.2m with a 120° field of view up to 12m. Detects people while ignoring pets below the detection pattern.

.png)
Step 7.1b
Snap the detector and lift the mirror
Push the detector downward, then raise the mirror. Avoid touching the mirror surface.
.png)
Step 7.2b
Lock the detector in position
Secure the detector in your chosen mount position (high or low mount) using the provided screw.
.png)
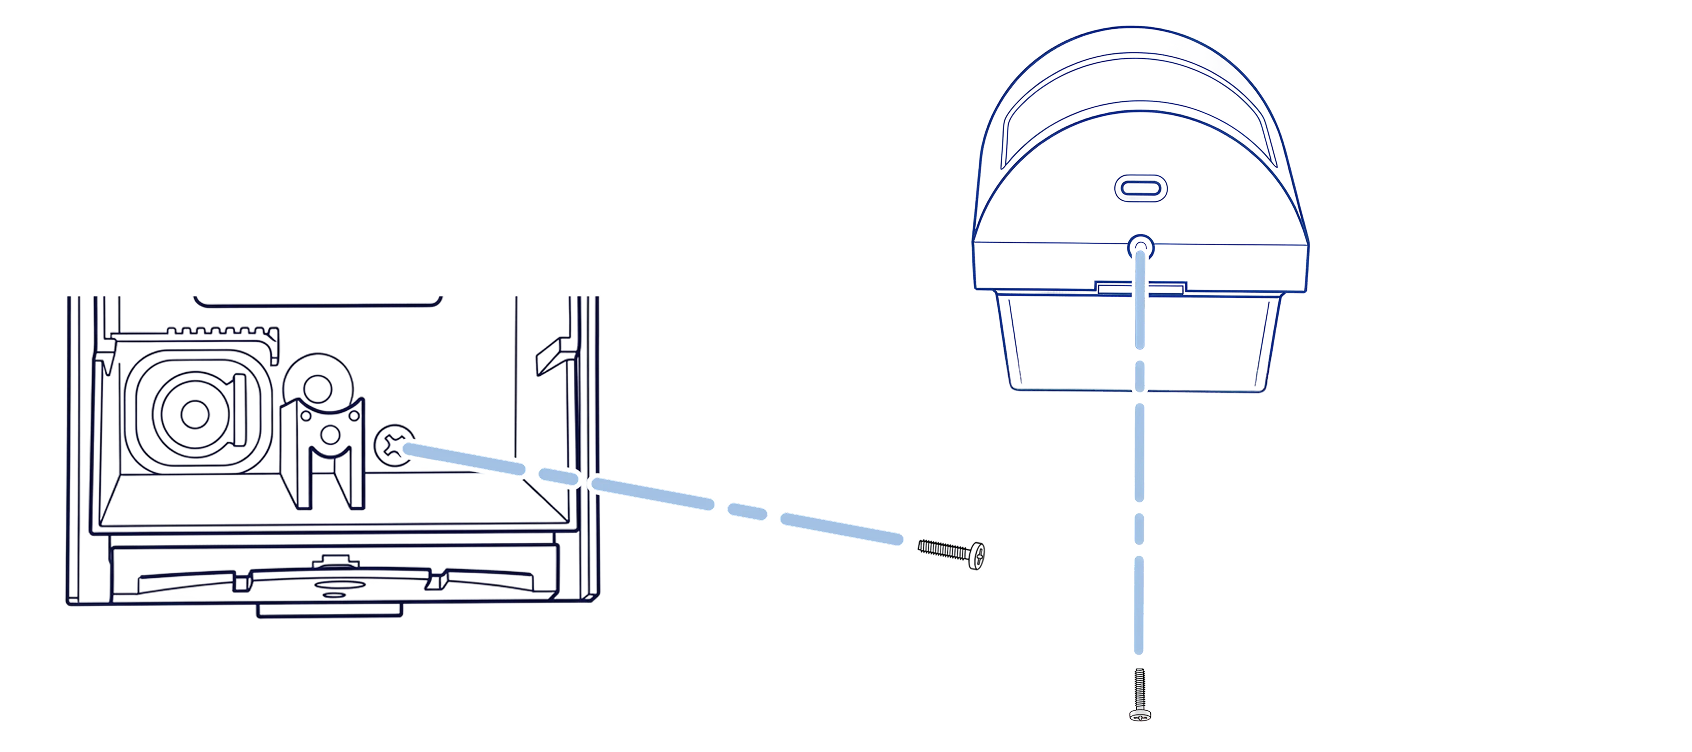
Step 8
Lock the enclosure
Use the locking screw to secure the detector shut for extra tamper protection.
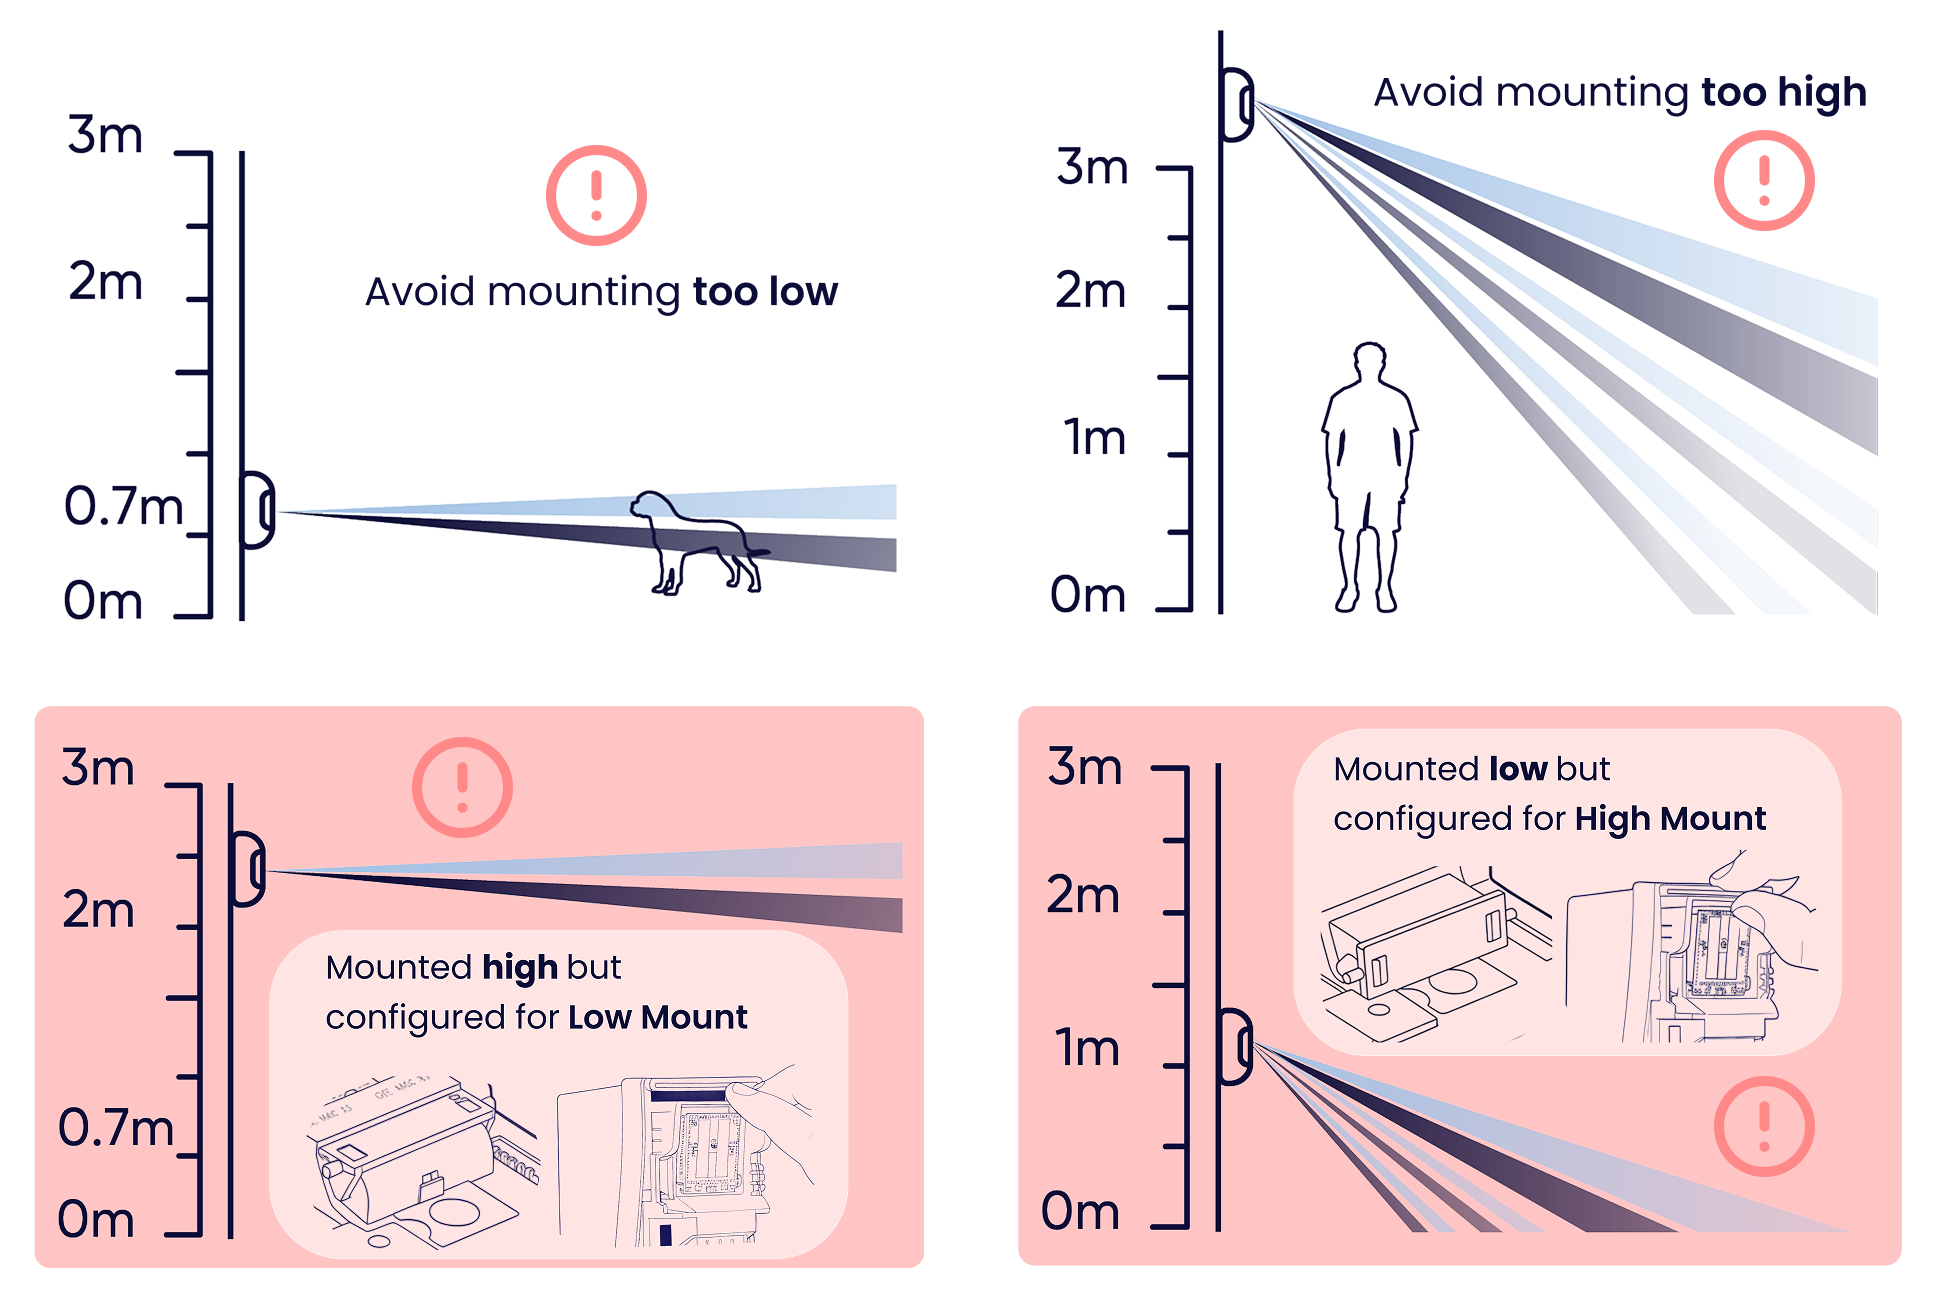
Tips
Reduce nuisance alarms
Avoid these common installation mistakes that can trigger false alarms.
%20(1).png)
Tips
Mounting mistakes to avoid
Match your mounting height to your configuration. High Mount requires elevated positioning; Low Mount requires 0.7m–2m height.
Troubleshooting
LED states
Understand what each LED pattern means on your Olarm SnapX and Olarm CONNECT.

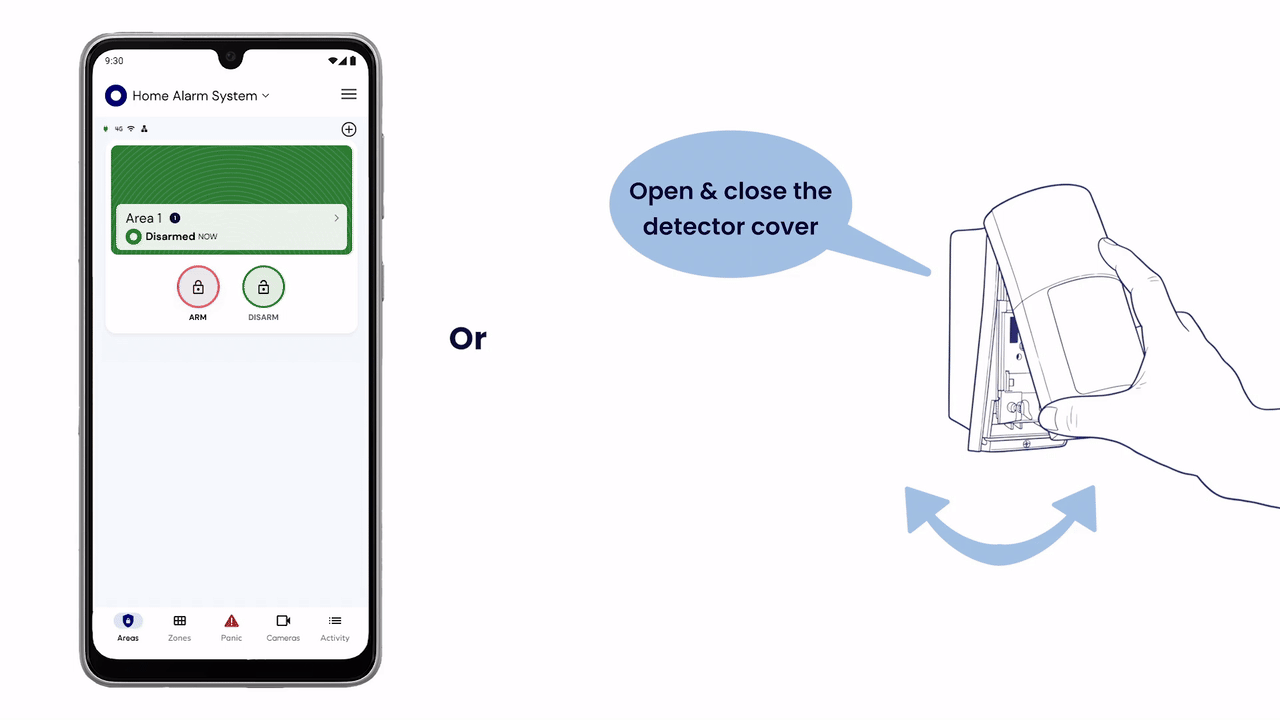
Step 9
Test your detector
Enable Detection Test mode in-app or by opening and closing the cover, then walk through the area to verify coverage. The red LED will flash when movement is detected.