


Step 1
Plan your installation
Take into consideration these aspects when planning your Olarm HUB installation.
.png)
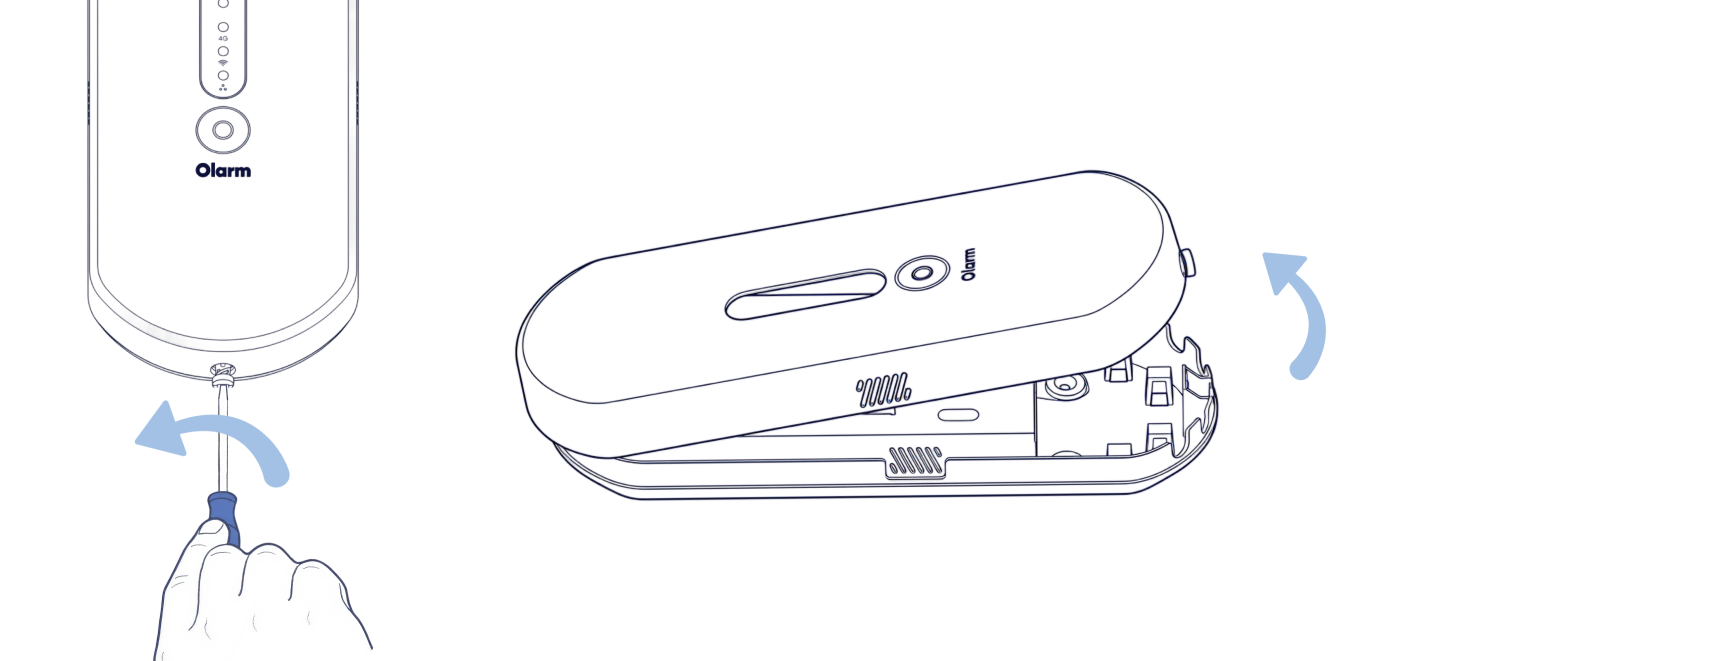
Step 2
Remove the front lid
Use a flathead screwdriver to release the locking screw and lift off the lid.
Step 3
Add your Olarm HUB
Scan the QR code on the Olarm HUB to add the device to your Olarm APP, then name your system.

Step 4
Insert the battery
Place the battery into the Olarm HUB. The system LED will flash white when powered on correctly to indicate the device is powering up. If you see a red LED, flip the battery around.

Step 5 (optional)
Connect to Wi-Fi
The device will be online immediately should cellular connectivity be available. Wi-Fi will improve speed and reliability of your system.
Step 5.1
Using the in-app prompt
After adding the Olarm HUB to the app, you will prompted to connect your device to Wi-Fi. If the Wi-Fi LED goes red, you have inserted the wrong Wi-Fi credentials.
Step 5.2
Using WPS mode
Hold the FN button down for 3 seconds with a flathead screwdriver. The system LED will begin flashing yellow. Then press the WPS button on the back of your Wi-Fi router. *Not all routers have the WPS functionality.

Step 6
Ensure adequate 4G location
Using the 4G LED lights, which update every 30 seconds, ensure the location of installation has good or strong connectivity. Reposition device if you only have one solid 4G LED.

Step 7
Connect a DC power source
The Olarm HUB supports DC power of up 24V. Only one DC power source can be supplied.
Step 7.1
Using the DC power adapter
Plug the provided DC power jack into the Olarm HUB & connect the power jack to the DC adapter, then plug into the main power source.

Step 7.2 (Alternative)
Directly wire in 7-24V DC
Wire a 7-24V DC power source into the terminals (+) & (-) on the Olarm HUB. Ensure the input does not exceed 24V to avoid oversupplying the device.

Step 8 (optional)
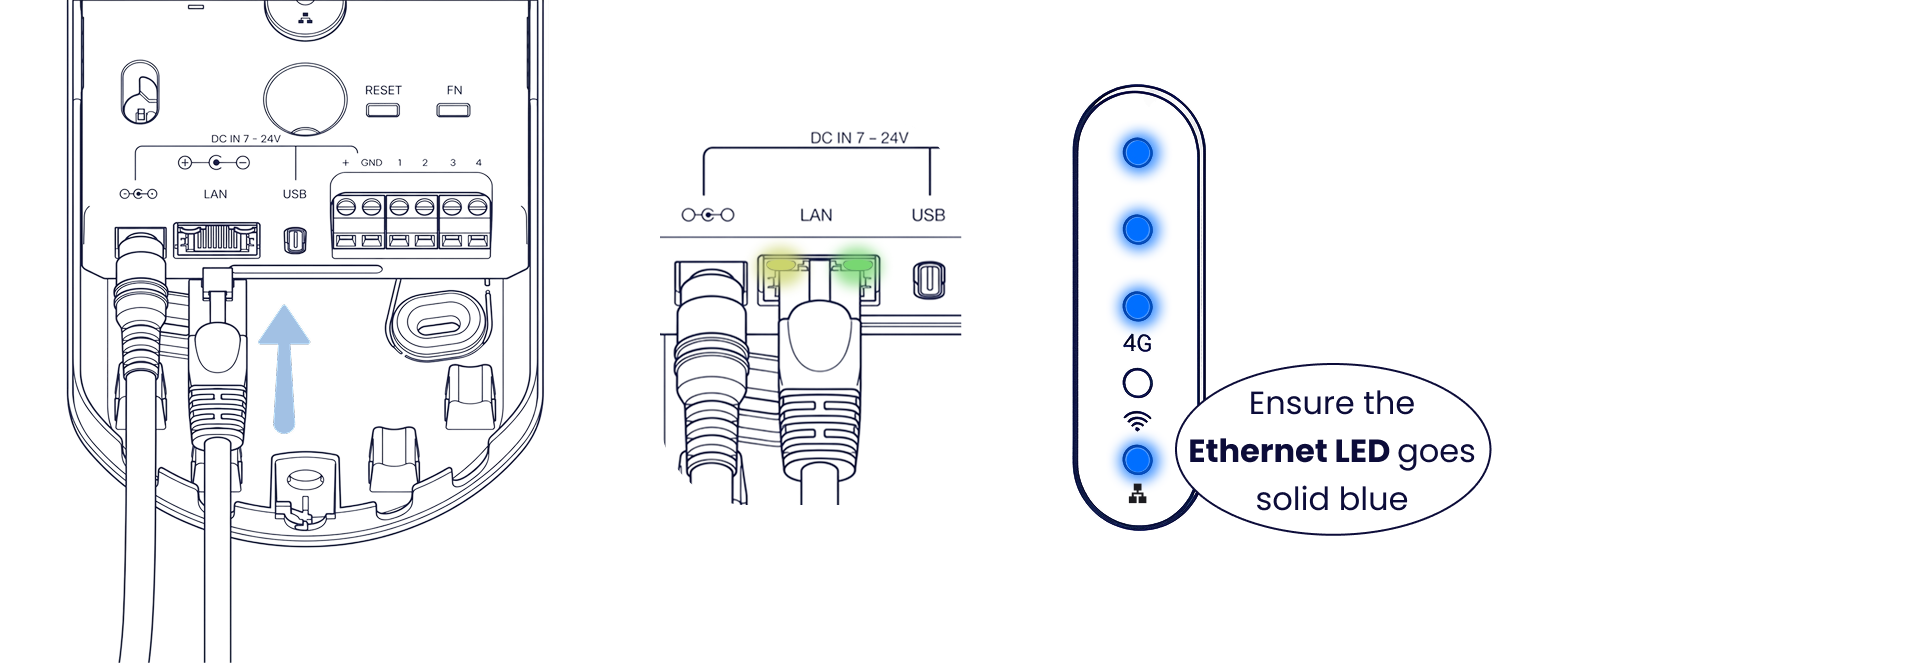
Connect to ethernet
Connecting the device to Ethernet will improve speed and reliability of your system. The LEDs on the Olarm HUB's LAN port will light up and the Ethernet LED indicator will go solid blue should the connection be successful.
Step 9
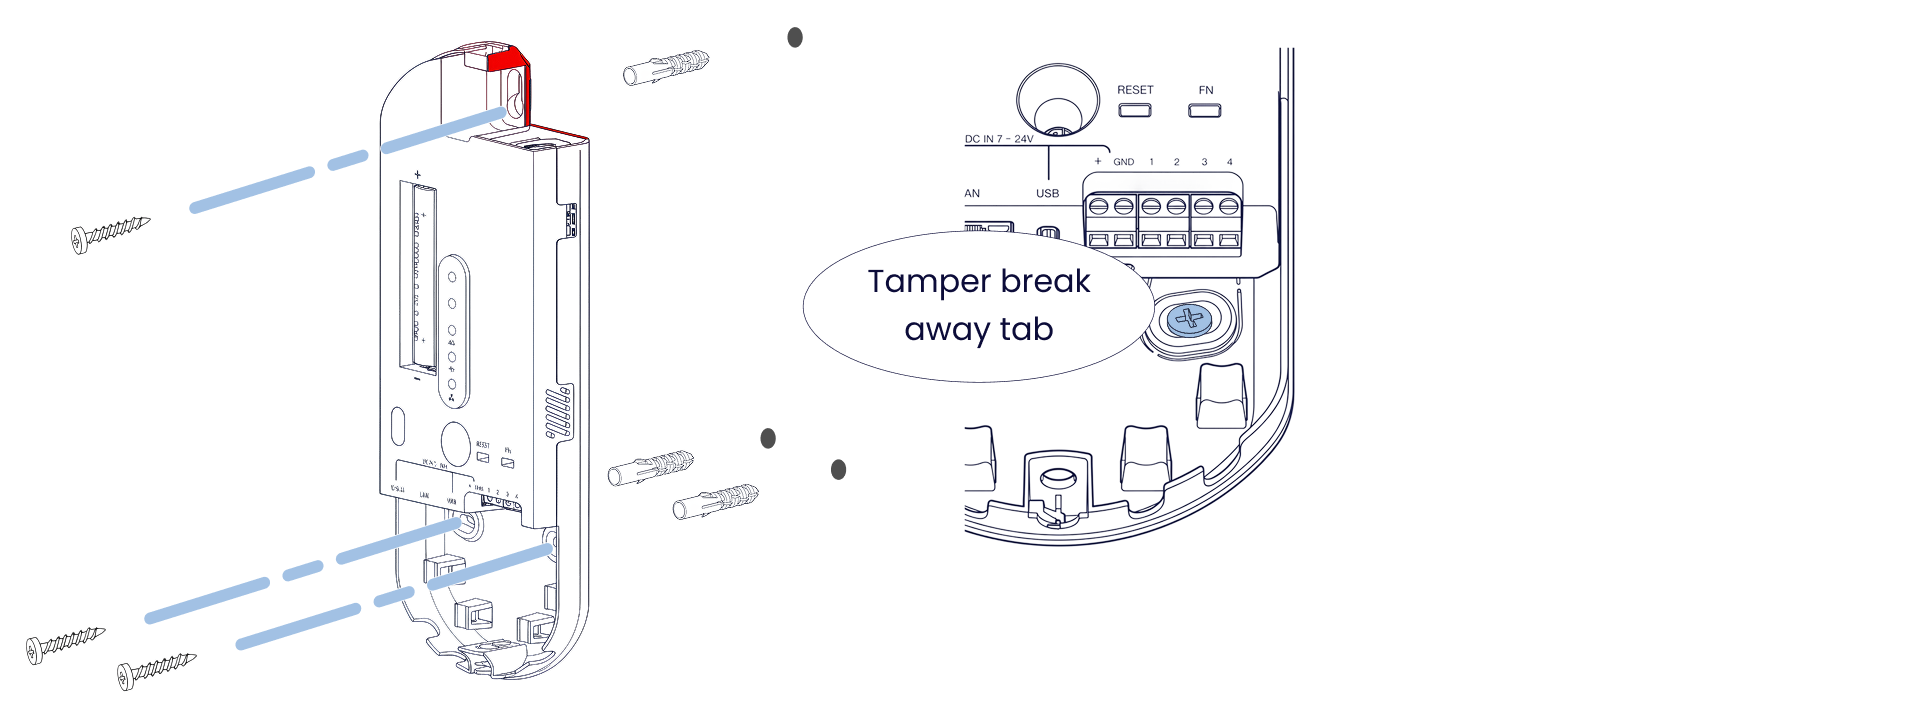
Secure to a surface
Olarm recommends mounting the Olarm HUB in a secure position with the provided mounting hardware. Ensure the tamper breakout is secured tightly.
Step 10
Secure the cables
Loop the provided cable ties through the strain-relief loops and around the cables. This provides extra tamper protection and prevents cable strain.

Step 11
Break off the cable knockouts
Snap out the relevant cable knockouts with pliers to allow the cables to run out the enclosure once closed.

Step 12
LED States of the Olarm HUB
Reference the LED patterns to understand your device status: